Looking to revamp your space with distressed laminate flooring but unsure whether to tackle it yourself or hire a professional? Wondering about the best approach for a flawless finish? Dive into our expert tips for installing distressed laminate flooring like a pro. From cost considerations to time-saving techniques, we’ve got you covered. Discover the secrets to achieving that rustic, chic look without the stress. Ready to take on the challenge and transform your space with trendy distressed laminate flooring? Let’s explore the ins and outs of DIY installation versus hiring a pro.
Table of Contents
ToggleDIY Installation vs. Professional Installation
Pros and Cons of DIY
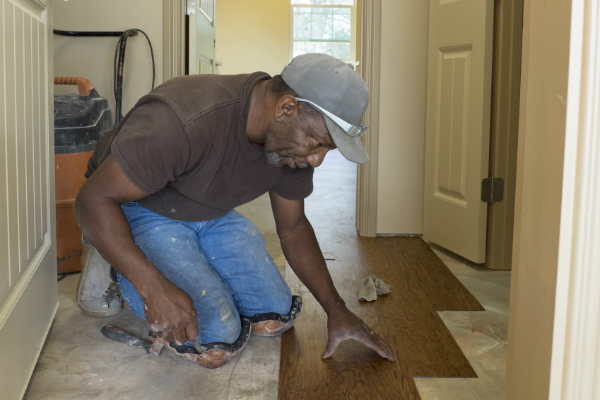
DIY installation of distressed laminate flooring can save money on labor costs. However, it requires time for research, preparation, and execution. Assess your comfort level with tools and tasks to ensure a successful outcome.
Pros and Cons of Hiring a Pro
Professional installation guarantees expertise and efficiency, ensuring a high-quality finish. Consider the warranty coverage provided by professionals against defects or issues. Enjoy the convenience of leaving the project in capable hands.
Cost Comparison
Comparing DIY expenses with professional labor costs is essential for budgeting. Factor in hidden costs like specialized tools needed for DIY projects. Professional installation offers long-term value due to quality workmanship and durability.
Skill Level Required
Basic skills like measuring, cutting, and laying flooring are crucial for DIY installation. Advanced skills may be necessary for intricate patterns or unconventional layouts. Assess your skill level to determine if you’re equipped for the project.
Preparing for DIY Installation
Gather Materials and Tools
When taking on a DIY laminate flooring project, essential tools include a tape measure, circular saw, tapping block, and pull bar. Quality materials like underlayment and adhesive are crucial for a lasting finish. You can purchase or rent tools from local hardware stores if you don’t own them.
- Tape measure
- Circular saw
- Tapping block
- Pull bar
Acclimate Laminate Planks
To prevent issues like warping or buckling, it’s crucial to acclimate laminate planks before installation. Allow the planks to sit in the room where they will be installed for at least 48 hours. Store the planks flat in their boxes during this period to ensure proper acclimation.
Clean and Prepare Subfloor
A clean, smooth, and level subfloor is essential for a successful laminate flooring installation. Repair any imperfections in the subfloor such as cracks or bumps before laying the new flooring. A poorly prepared subfloor can lead to an uneven final installation and cause issues down the line.
- Repair imperfections
- Ensure smoothness
- Level the subfloor
Plan Layout and Measure
Before starting the installation process, it’s crucial to plan the layout of your laminate flooring. Decide on the best direction to lay the planks based on the shape and size of your room. Measure multiple times to avoid mistakes and ensure a precise fit for each plank.
Measuring and Cutting Planks
Accurate Measurements
To ensure a successful installation, precise measurements are crucial. Use a carpenter’s square to check corners for accuracy. Mark measurements clearly to prevent errors.
Cutting Techniques
Various cutting methods are suitable for laminate flooring. Utilize tools like circular saws or laminate cutters for efficient cuts. Prioritize safety by following guidelines when cutting laminate planks.
Avoiding Splinters
Minimize splintering while cutting laminate by employing specific techniques. Opt for a fine-toothed saw blade to achieve cleaner cuts. Proper handling is essential to prevent damage during the cutting process.
Managing Gaps
Managing expansion gaps around the perimeter is vital for long-term durability. Consistent spacing is key to allow for floor movement without issues. In case of post-installation gaps, solutions exist for effective gap filling.
Installing Laminate Flooring
Starting at Doorways
Starting installation at doorways ensures a seamless look throughout the room. Measure and cut planks to fit neatly around door frames, maintaining a professional finish. Plan transitions at doorways meticulously to achieve a cohesive and visually appealing result.
When laying laminate flooring, it is crucial to stagger boards for a natural appearance. This technique involves alternating the starting point of each row to avoid visible seams. Optimal stability is achieved by following a recommended stagger pattern, enhancing the durability of the floor. A staggered layout not only improves structural integrity but also adds an aesthetic touch to the overall design.
Staggering Boards
To create a visually appealing floor, staggering boards is essential. By staggering planks, you can achieve a more authentic look, resembling traditional hardwood flooring. The recommended stagger pattern involves offsetting end joints between adjacent rows, preventing weak spots in the installation. Embracing this method not only enhances the visual appeal but also contributes to the longevity of the laminate floor.
When installing laminate flooring, using underlayment is crucial for various reasons. Underlayment acts as a moisture barrier, sound insulator, and provides cushioning underfoot. Different types of underlayment are available, including foam, cork, and combination options. Properly installing underlayment before laying planks ensures a smooth surface and helps prolong the lifespan of the flooring.
Using Underlayment
Underlayment plays a vital role in laminate flooring installation by providing additional support and protection. It helps reduce noise transmission and offers thermal insulation benefits. Selecting the right type of underlayment based on your specific needs is essential for a successful installation. Properly installing underlayment before laying down laminate planks is crucial for ensuring a stable and comfortable floor.
Transition strips are essential components when installing laminate flooring between rooms or different types of flooring. These strips create a seamless transition, covering gaps and protecting edges from damage. Choosing the appropriate transition strip that complements your laminate floor is key to achieving a polished look. Following the correct installation process for transition strips ensures a professional finish and enhances the overall aesthetics of your space.
Common Mistakes to Avoid
Poor Measurements
Poor measurements are common mistakes that can lead to significant issues during laminate flooring installation. Inaccurate measurements often result in pieces that don’t fit correctly. This can cause gaps, uneven edges, and a sloppy overall appearance. To avoid this, always measure multiple times before cutting any planks.
Double-checking measurements is crucial to ensure a precise fit. Inaccurate measurements not only waste materials but also time and effort. Taking the time to measure accurately can save you from costly mistakes down the line. Remember, measure twice, cut once for a seamless installation process.
Incorrect Cutting
Incorrect cuts are another common mistake that DIYers make when installing laminate flooring. Improper cuts can ruin the entire look of the floor. For example, jagged edges or mismatched pieces can create an unprofessional finish. If you make a mistake while cutting, don’t panic. There are ways to fix it, such as using transition strips or covering small errors with moldings.
To avoid incorrect cuts, use a sharp blade and measure precisely before cutting. Proper tools and techniques are essential for achieving clean and accurate cuts. Take your time during the cutting process to ensure each piece fits perfectly into place.
Ignoring Acclimation
Skipping the acclimation process is a common mistake that many people overlook when installing laminate flooring. Acclimation allows the planks to adjust to the humidity and temperature of the room, preventing issues like warping or buckling later on. Moisture levels play a crucial role in how well laminate flooring performs over time.
To prevent problems related to moisture, follow the manufacturer’s guidelines for acclimation. Allow the flooring to sit in the room for at least 48 hours before installation. This step is crucial for ensuring a stable and long-lasting floor.
Skipping Underlayment
Neglecting to use underlayment beneath laminate flooring is a common mistake that can impact both comfort and durability. Underlayment provides sound absorption, cushioning underfoot, and helps smooth out minor imperfections in the subfloor. Without underlayment, you may experience more noise, less comfort when walking on the floor, and increased wear and tear on the laminate planks.
Investing in quality underlayment is essential for maximizing the lifespan of your laminate flooring. Choose underlayment specifically designed for laminate floors to reap all its benefits. Proper underlayment ensures a quieter, softer feel underfoot while protecting your flooring from damage.
Installing in Different Areas
Living Rooms and Bedrooms
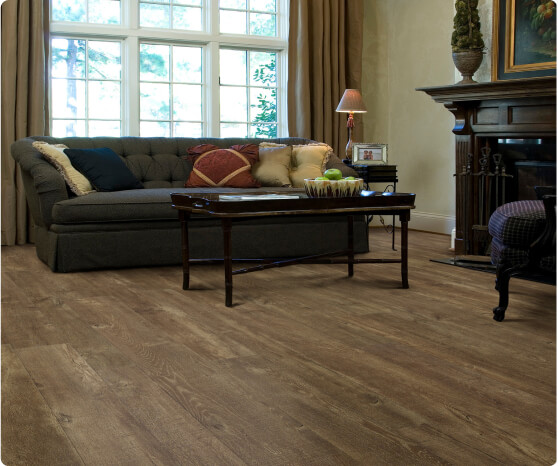
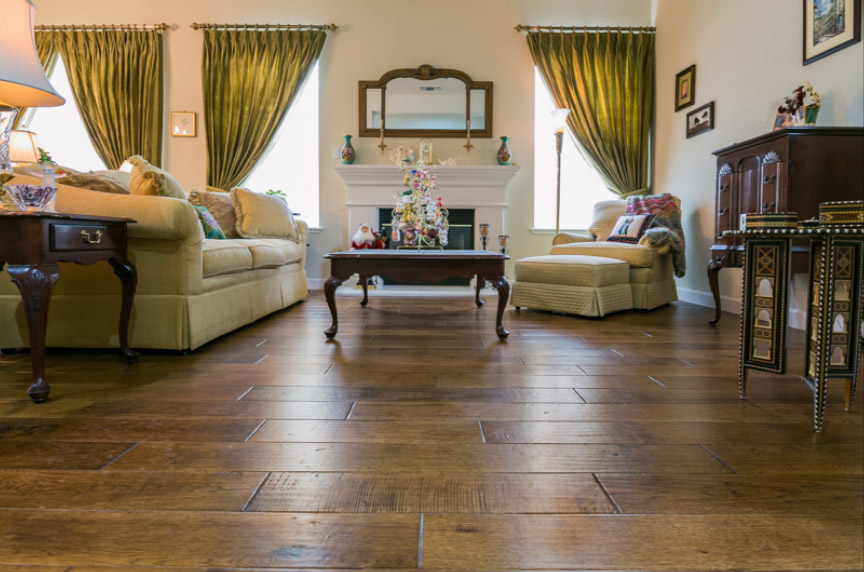
When installing distressed laminate flooring in living rooms, opt for warm tones to create a cozy atmosphere. For bedrooms, consider softer shades for a calming effect. Laminate flooring is ideal for high-traffic areas due to its durability and scratch-resistant properties. Regular sweeping or vacuuming is essential to maintain the floor’s appearance in these rooms.
Kitchens and Bathrooms
Installing laminate in kitchens and bathrooms requires moisture-resistant options to prevent damage from spills or humidity. Waterproof laminate is a great choice for these areas, offering protection against moisture. To maintain laminate in kitchens and bathrooms, wipe up spills promptly and avoid excessive water exposure to prevent warping or swelling.
Hallways and Stairs
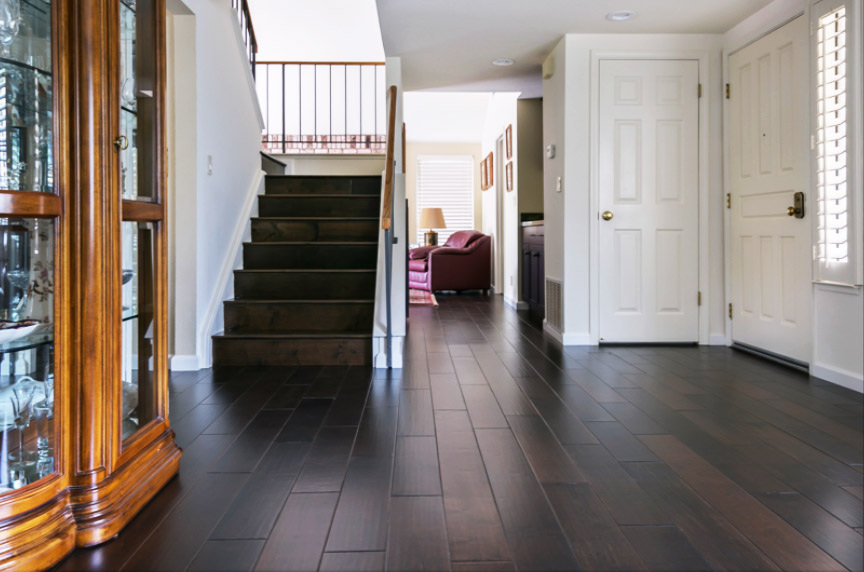
Select laminate flooring with a high AC rating for hallways, ensuring durability against heavy foot traffic. For stairs, safety is paramount; use stair nosing for a secure grip. Installing laminate on stairs involves careful measurements and proper adhesive application. Durability is crucial for hallways to withstand constant use without showing signs of wear.
Basements and Attics
Installing laminate in basements requires moisture-resistant flooring to combat potential dampness. Consider using a vapor barrier to protect the laminate from moisture seeping through the concrete subfloor. In attics, temperature fluctuations can impact laminate flooring; ensure proper ventilation to prevent issues like buckling or cupping. Adequate airflow is crucial in both basements and attics to maintain the integrity of the laminate flooring.
FAQ About Installation
Best Underlayment Types
Foam, cork, and rubber are common underlayment materials for laminate flooring. Foam underlayment is cost-effective and offers sound absorption benefits. Cork underlayment provides natural insulation and is eco-friendly. Rubber underlayment is durable and ideal for high-traffic areas. For areas prone to moisture, consider a vapor barrier underlayment.
Installing on Stairs
To install laminate flooring on stairs, start by removing the existing nosing and tread caps. Cut the laminate planks to fit the stair dimensions precisely. Use a quality adhesive to secure each plank in place. Finish the edges with stair nosing for a polished look. Remember to install stair nosing for safety and aesthetics.
Handling Moisture Issues
Signs of moisture problems include mold growth, musty odors, or warping of flooring. Before installation, address any moisture issues by sealing concrete subfloors and ensuring proper ventilation. Post-installation, maintain indoor humidity levels between 30% to 50% to prevent moisture-related damage.
Maintenance Tips
Regularly sweep or vacuum laminate flooring to remove dirt and debris that can cause scratches. Use a damp mop with a mild cleaner for deeper cleaning. Avoid using harsh chemicals or excessive water, as they can damage the floor’s protective layer. Inspect the flooring periodically for any signs of wear, such as scratches or fading.
Final Remarks
After considering the DIY vs. professional installation debate, preparing, measuring, cutting, and avoiding common mistakes in installing distressed laminate flooring, you are now equipped to tackle this project successfully. Remember to adapt your approach based on the area you are working on and refer to the FAQ section for any lingering doubts. By following these tips diligently, you can achieve a professional-looking result while saving money and enjoying the satisfaction of a job well done.
Take the plunge, gather your tools, and get ready to transform your space with confidence. Your new distressed laminate flooring awaits! Good luck with your installation journey!
Frequently Asked Questions
1. Can I install distressed laminate flooring in my bathroom?
Yes, you can install distressed laminate flooring in your bathroom as long as you take precautions to prevent water damage. Ensure proper sealing around edges and use waterproof underlayment for better protection against moisture.
2. How long does it typically take to install distressed laminate flooring?
The time it takes to install distressed laminate flooring varies based on the room size and experience level. On average, a DIY installation can take a weekend for a small room, while professional installation may be completed in a day.
3. Do I need special tools to install distressed laminate flooring?
While basic tools like a saw, tape measure, and hammer are essential, having a tapping block, pull bar, and spacers can make the installation process smoother. Renting or purchasing these specialized tools can help achieve a more professional finish.
4. Can I install distressed laminate flooring over existing tile or carpet?
It’s generally recommended to remove existing tile or carpet before installing distressed laminate flooring for better results. Installing over an uneven surface can lead to issues with the new flooring’s stability and appearance.
5. Is underlayment necessary when installing distressed laminate flooring?
Using underlayment is crucial when installing distressed laminate flooring as it provides cushioning, sound absorption, moisture protection, and helps with minor subfloor imperfections. Opt for underlayment specifically designed for laminate flooring for optimal performance and longevity.
Looking for the Perfect Flooring Design? Discover Distressed Laminate at K Floors in Concord, California!
K Floors isn’t just a flooring company; we’re your partners in creating spaces that embody quality and style. Our collection of distressed laminate flooring brings a rustic yet sophisticated charm to any room. Experience the K Floors difference. Our expert team is here to guide you, offering complimentary in-home consultations and a selection sourced from top laminate suppliers. Explore our extensive collection and find not just a floor, but a reflection of your unique vision. At K Floors, we blend traditional craftsmanship with modern design, ensuring every floor we install makes your space feel truly like home. Whether for residential or commercial projects, we’re committed to quality and authenticity. Visit us in Concord, California, and start your journey to the ideal flooring design with K Floors.
Disclaimer
The materials available on this website are for informational and entertainment purposes only and not to provide legal advice. You should contact your attorney to obtain advice concerning any particular issue or problem. You should not act or refrain from acting based on any content included in this site without seeking legal or other professional advice. The information presented on this website may not reflect the most current flooring developments. No action should be taken in reliance on the information contained on this website and we disclaim all liability concerning actions taken or not taken based on any or all of the contents of this site to the fullest extent permitted by law.

